Guide to Multiple Audio Reactive Effects in Multi2Vid

With Imagineapp's Multi2Vid feature, you can bring your audio to life by separating it into multiple channels such as vocals, drums, bass, etc., and applying different reactive effects to each one. We've taken creativity to a whole new level - all you need to do is to imagine it.
Before we start, here is a link to our quick video guide if you prefer visual instructions.
If you're ready to delve into the guide, let's get started:
Choose your input: Click on 'Imagine A Video'. Here you can enter a prompt that you want to visualize in your output video. Alternatively, you can upload an image to start with.
Select your style: Choose the style you want your video to be in. This style can be one of the predefined styles or a style you've trained yourself.
Upload your audio: Next, upload the audio file that you want to work with.
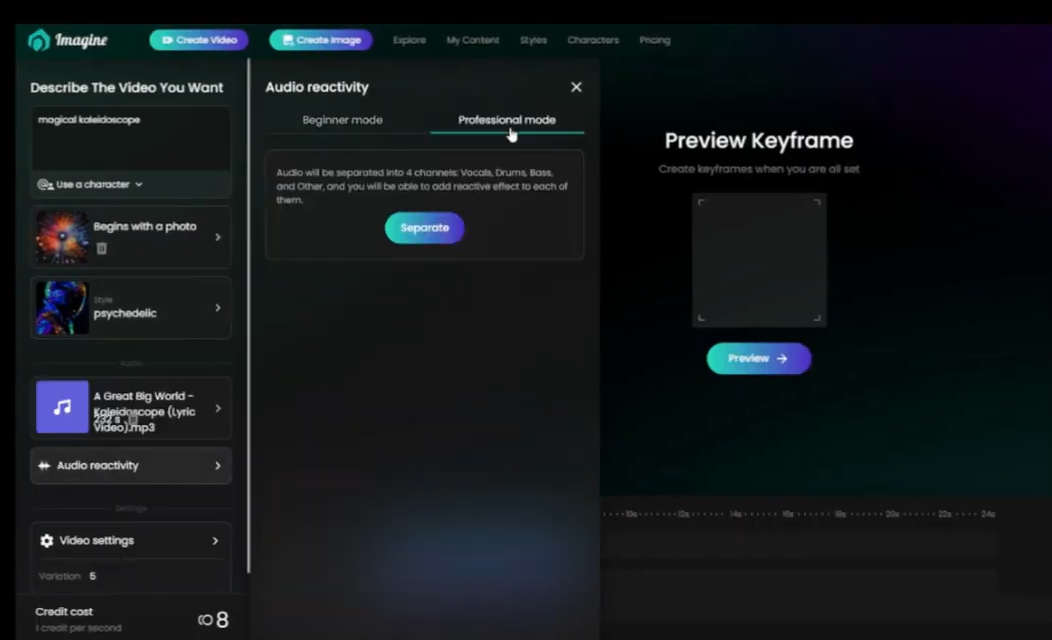
Apply Audio Reactive Effects: In the 'Audio Reactive Effects' section, click on 'Separate Track'. This allows you to split the audio into different channels. After you've separated the channels, apply the desired effects to each channel.
Enhance your video: Take advantage of the option to add multiple prompts and effects to make your output more dynamic and captivating.
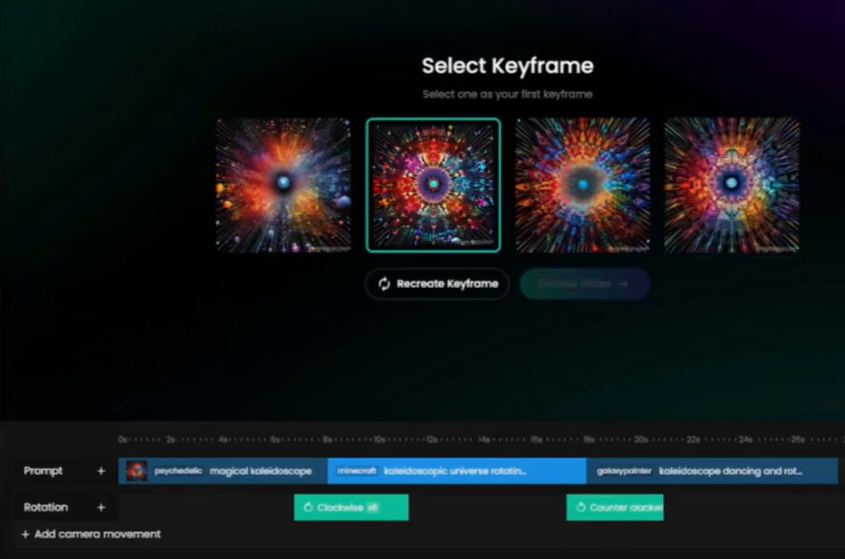
Preview and Render: Once you've set everything according to your preference, click on 'Preview' to see a preview of a few frames of your video. If you're satisfied with the result, click on 'Finalize Video' to render the full video.
And that's it! You've successfully applied multiple audio reactive effects in your video. Happy creating with Imagineapp!